How To Program The Wall Switch For Our Battery-Operated Shades
Find instructions on how to program the wireless wall switch on a Quiltcraft battery-operated roller or roman shade here! Keep in mind that the steps to program your switch vary depending on the type of motor on your roller shade.
Steps:
Hold down translucent button on motor head and hold for approximately 15 seconds until roller shade jogs 3 times, then release.
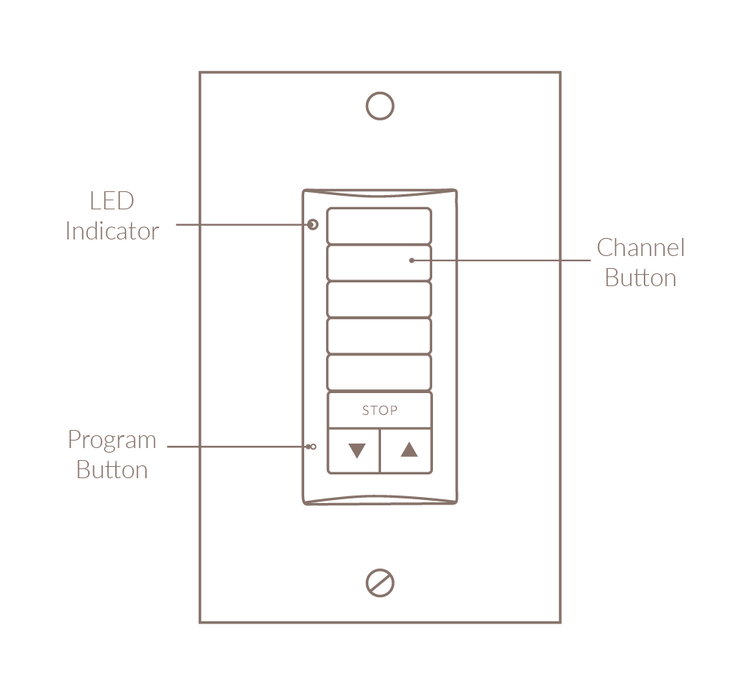
If programming a 1 channel remote, go to step 3. If 5 channel, select a channel to link by pressing the Channel button. The LED will light to indicate the channel has been selected.
Press and hold UP and DOWN buttons simultaneously until shade jogs once. Switch is now paired to the motor.
Test roller shade by pressing DOWN. If direction is incorrect, press and hold STOP button until drape jogs once to modify direction. Repeat step 4 to confirm.
Set upper limit by pressing UP to move the shade to the desired upper position. Press and hold STOP and DOWN simultaneously until shade starts to move, then release (if it stops when buttons are released , take back to upper limit and repeat). Stop shade at desired lower limit. Upper limit is now programmed.
Set lower limit by pressing DOWN to move the shade to the desired lower position. Press and hold MY and UP simultaneously until shade starts to move, then release. Lower limit is now programmed.
To confirm and complete limit programming, press and hold the STOP button until shade jogs once.
Using a paper clip and briefly press Programming Button, until shade jogs once. Shade is in user mode now.
Repeat steps 1-8 for subsequent channels.
Explore Similar Resources